この記事は3年以上前に書かれた記事で内容が古い可能性があります
WordPressのSSL化
参考:Terraformを使ってWordPress on Bitnami on AWSを新しいバージョンに移行した作業ログ(6)〜Really Simple SSLを使ってサイトをHTTPSでアクセスできるようにする〜
WordPressのSSL化(http://~ではなくhttps://~に対応させる)について
Really Simple SSLというPluginを利用
一見やる気のないアイコンだが、とても人気のPlugin
目次
(1)「wp-config.php」の権限変更
Pluginを入れてActivateすると、以下のようなエラーが出る
「System detection encountered issues
A definition of a siteurl or homeurl was detected in your wp-config.php, but the file is not writable.
Set your wp-config.php to writable and reload this page.」
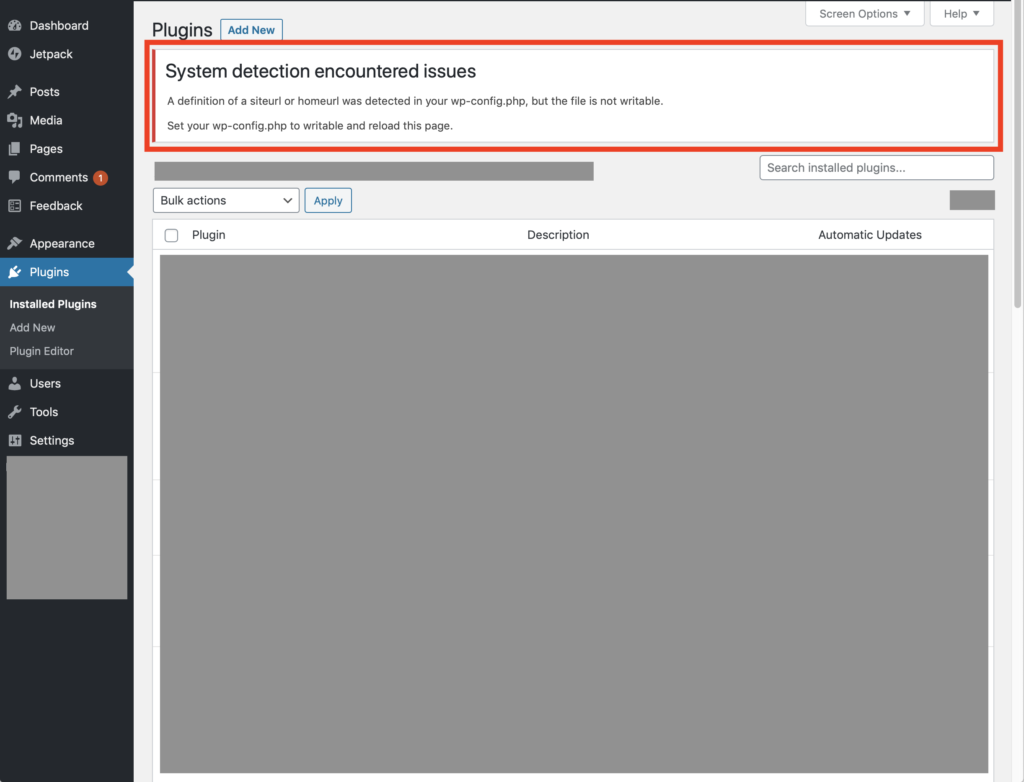
「wp-config.php」の書き込みができないとのことなので、書き込みを許可してあげる
(終わったら元に戻すのを忘れずに)
現状こうなっているはずなので、
$ ls -liah /opt/bitnami/apps/wordpress/htdocs/wp-config.php
402196 -rw-r----- 1 bitnami daemon 4.2K Sep 25 07:08 /opt/bitnami/apps/wordpress/htdocs/wp-config.php
変更する
$ chmod g+w /opt/bitnami/apps/wordpress/htdocs/wp-config.php
変更(「w」が追加)されたことを確認
$ ls -liah /opt/bitnami/apps/wordpress/htdocs/wp-config.php
402196 -rw-rw---- 1 bitnami daemon 4.2K Sep 25 07:08 /opt/bitnami/apps/wordpress/htdocs/wp-config.php
(2)SSL証明書の入手
次にWordpressの画面に戻ると、証明書が無いとエラーが出ている
「Detected possible certificate issues
Really Simple SSL failed to detect a valid SSL certificate. If you do have an SSL certificate, try to reload this page over https by clicking this button:」
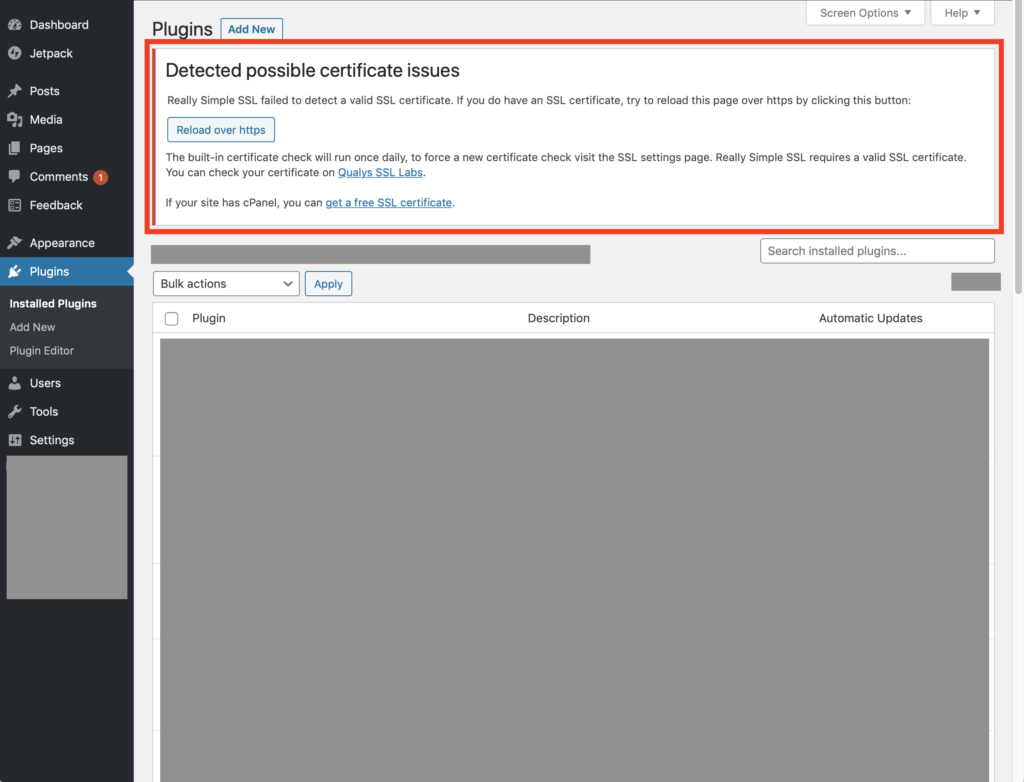
なんとBitnamiのコマンドで簡単に「Let’s Encrypt」の証明書がインストールでき、しかも自動で更新してくれるとのことなので早速使ってみる
参考:Auto-Configure A Let’s Encrypt Certificate
「sudo /opt/bitnami/bncert-tool」というコマンドだけで簡単に証明書の設定ができる
Version updateしろと出るので、一度アップデートする
$ sudo /opt/bitnami/bncert-tool
An updated version is available. Would you like to download it? You would need to run it manually later. [Y/n]: Y

The tool will exit now. To run the updated version run the following command:

/opt/bitnami/bncert-tool
アップデートが終わってからもう一度コマンドを打つと、DNSで引けないとエラーになるので、DNS登録を済ませる
$ sudo /opt/bitnami/bncert-tool
----------------------------------------------------------------------------
Welcome to the Bitnami HTTPS Configuration tool.

----------------------------------------------------------------------------
Domains

Please provide a valid space-separated list of domains for which you wish to
configure your web server.

Domain list []: www.yoshiislandblog.net

The following domains were not included: yoshiislandblog.net. Do you want to add them? [Y/n]: Y

Warning: The domain 'yoshiislandblog.net' does not resolve, please fix its DNS
entries or remove it.
Press [Enter] to continue:
今度こそ成功
$ sudo /opt/bitnami/bncert-tool
----------------------------------------------------------------------------
Welcome to the Bitnami HTTPS Configuration tool.

----------------------------------------------------------------------------
Domains

Please provide a valid space-separated list of domains for which you wish to
configure your web server.

Domain list []: yoshiislandblog.net, www.yoshiislandblog.net

----------------------------------------------------------------------------
Enable/disable redirections

Please select the redirections you wish to enable or disable on your Bitnami
installation.


Enable HTTP to HTTPS redirection [Y/n]: Y


Enable non-www to www redirection [Y/n]: Y


Enable www to non-www redirection [y/N]: N


----------------------------------------------------------------------------
Changes to perform

The following changes will be performed to your Bitnami installation:

1. Stop web server
2. Configure web server to use a free Let's Encrypt certificate for the domains:
yoshiislandblog.net www.yoshiislandblog.net
3. Configure a cron job to automatically renew the certificate each month
4. Configure web server name to: yoshiislandblog.net
5. Enable HTTP to HTTPS redirection (example: redirect
https://www.yoshiislandblog.net to https://www.yoshiislandblog.net)
6. Enable non-www to www redirection (example: redirect yoshiislandblog.net to
www.yoshiislandblog.net)
7. Start web server once all changes have been performed


Do you agree to these changes? [Y/n]: Y


----------------------------------------------------------------------------
Create a free HTTPS certificate with Let's Encrypt

Please provide a valid e-mail address for which to associate your Let's Encrypt
certificate.

Domain list: yoshiislandblog.net www.yoshiislandblog.net

Server name: yoshiislandblog.net

E-mail address []: hogehoge

The Let's Encrypt Subscriber Agreement can be found at:

https://letsencrypt.org/documents/LE-SA-v1.2-November-15-2017.pdf

Do you agree to the Let's Encrypt Subscriber Agreement? [Y/n]: Y


----------------------------------------------------------------------------
Performing changes to your installation

The Bitnami HTTPS Configuration Tool will perform any necessary actions to your
Bitnami installation. This may take some time, please be patient.

----------------------------------------------------------------------------
Success

The Bitnami HTTPS Configuration Tool succeeded in modifying your installation.

The configuration report is shown below.

Backup files:
* /opt/bitnami/apache2/conf/httpd.conf.back.202009251704
* /opt/bitnami/apache2/conf/bitnami/bitnami-apps-prefix.conf.back.202009251704
* /opt/bitnami/apache2/conf/bitnami/bitnami.conf.back.202009251704

Find more details in the log file:

/tmp/bncert-202009251704.log

If you find any issues, please check Bitnami Support forums at:

https://community.bitnami.com

Press [Enter] to continue:
(3)WordpressサイトのSSL化
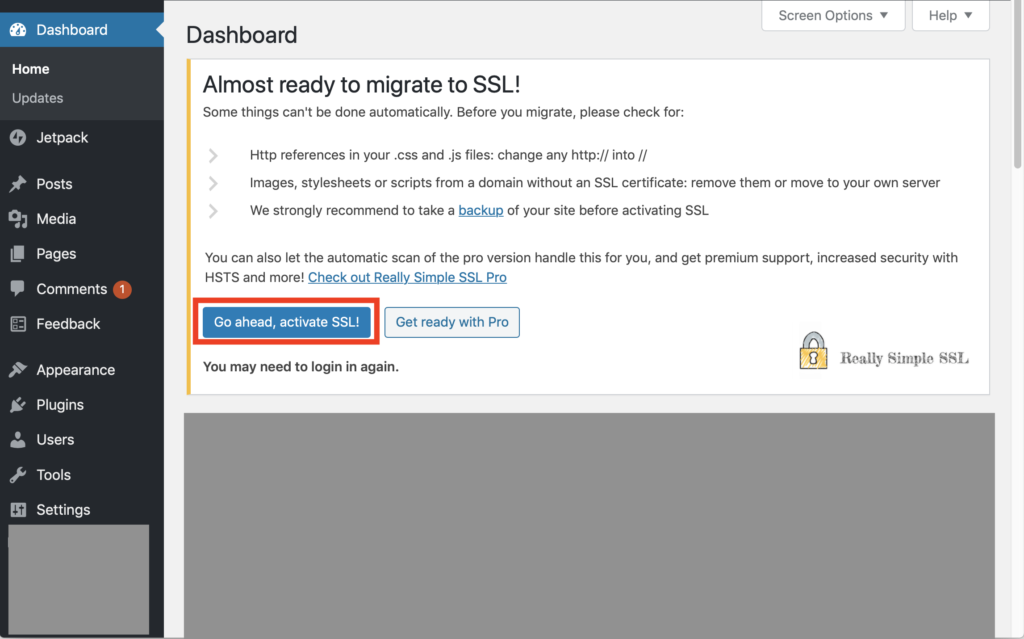
WordPressのダッシュボードに戻ると「Almost ready to magrate to SSL!」と良さげなメッセージに変わっている
「Go ahead, activate SSL!」ボタンをクリックして、SSL化を完成させる
(4)301リダイレクト設定
これで晴れてSSL化できるのだが、一つ以下の警告が出でいるので処理しておく
「WordPress 301 redirect enabled. We recommend to enable the 301 .htaccess redirect option on your specific setup.」
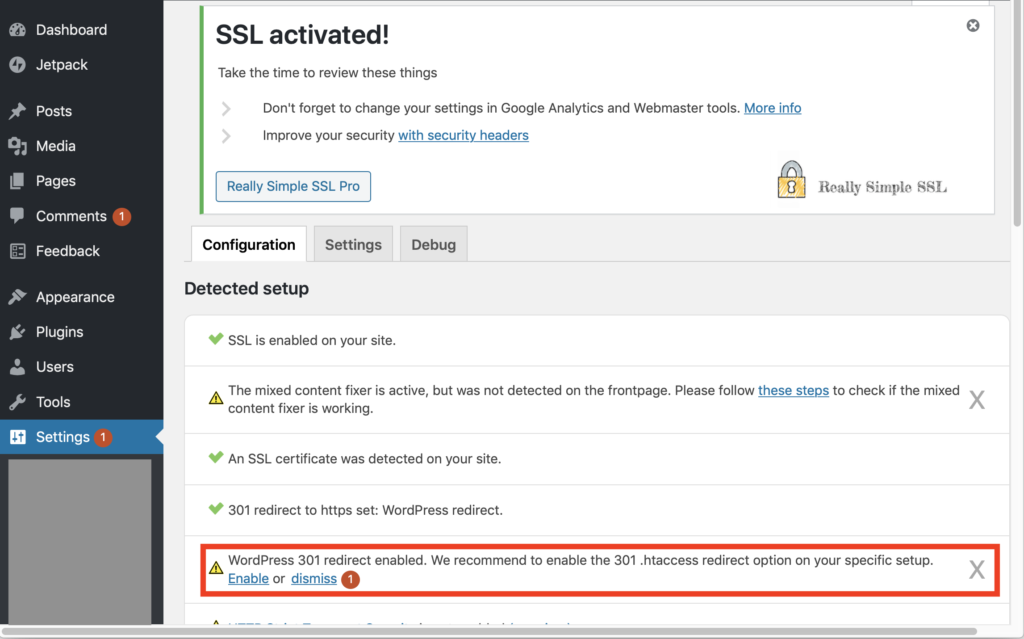
「Enable」をクリックして進む
次の画面で「Enable 301 .htaccess redirect」をオンにすれば良いのだが、不具合?が起こる可能性があるので、WordpressサーバにFTPアクセスできることを確認してからオンにするように、とのこと
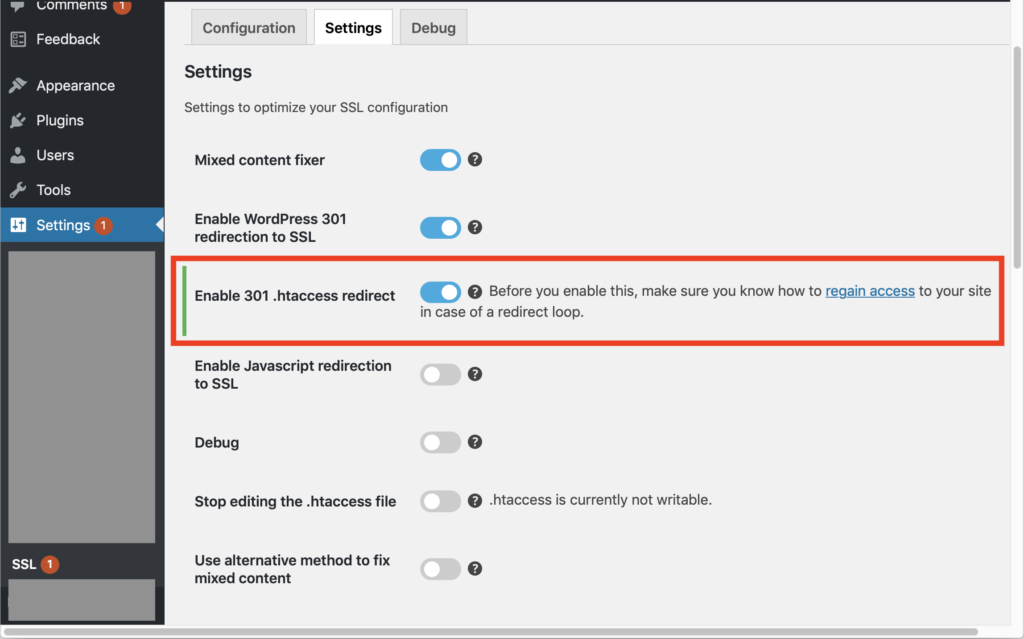
詳しくは以下のリンク先のページを参照ください
参考:Remove .htaccess redirect on site lockout
問題なければオンにして、完了!
以上。


